

Moisture Resistant Drywall Bathroom Guide
- Devlin Drywall

- 4 days ago
- 6 min read
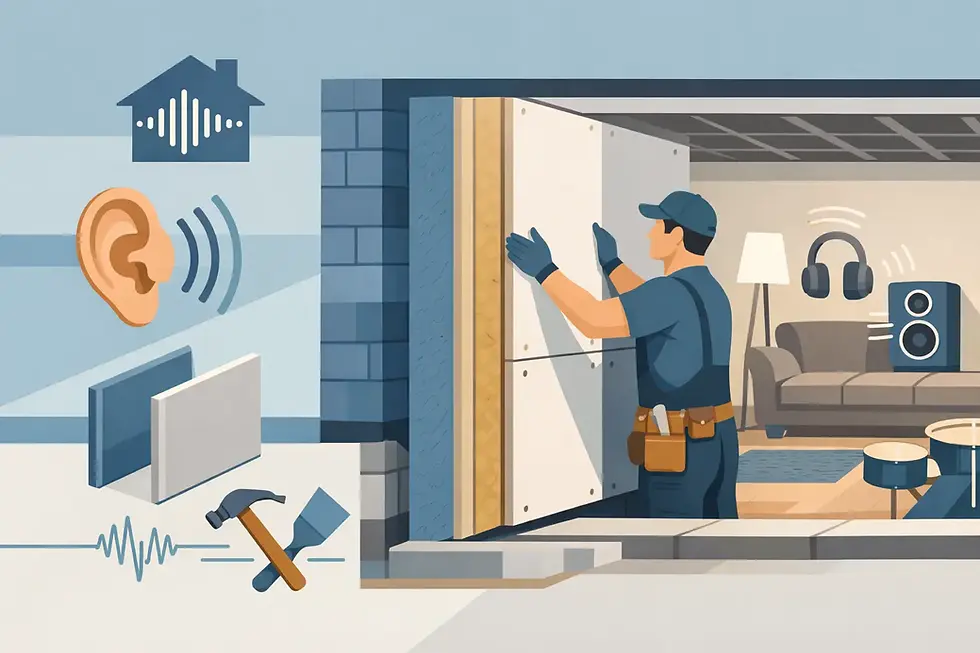
A bathroom can look perfectly finished on the surface and still have trouble starting behind the paint. That is usually how moisture problems begin - not with a dramatic leak, but with daily steam, poor ventilation, and the wrong wallboard in the wrong place. If you are planning a moisture resistant drywall bathroom, the material choice matters, but so does where it is installed and how the room is finished.
Many homeowners assume green board or another moisture-resistant panel makes the bathroom "waterproof." It does not. That misunderstanding leads to soft walls, swollen corners, tile failures, and mould issues that could have been avoided with better planning. The right drywall helps, but only when it is matched to the actual conditions in the room.
Is moisture resistant drywall right for a bathroom?
In many cases, yes. Moisture-resistant drywall is a practical choice for bathroom walls and ceilings in areas that deal with humidity, occasional splashing, and regular temperature changes. It is designed to hold up better than standard drywall when exposed to damp air, which makes it a smart upgrade in powder rooms, family bathrooms, and ensuite renovations.
That said, "better than standard" is not the same as suitable everywhere. A bathroom has different moisture zones. The wall behind a vanity sees a very different level of exposure than the inside of a shower enclosure. One product should not be expected to do every job.
For most bathrooms, moisture-resistant drywall works well on the main wall and ceiling surfaces outside direct wet zones. If the room has a good exhaust fan, proper insulation, and careful finishing, it can perform very well over the long term. If the bathroom has chronic condensation, poor airflow, or repeated water contact, the drywall choice needs more thought.
Where moisture resistant drywall bathroom installations work best
The best use for moisture-resistant drywall in a bathroom is anywhere exposed to humidity but not constant direct water. That usually includes the ceiling, the walls around the room, and the areas near a vanity or toilet. These are the surfaces that take steam from showers, moisture from towels, and normal day-to-day humidity.
This is also where proper finishing matters. Even a moisture-resistant panel can fail early if seams are poorly taped, corners are left vulnerable, or the paint system is not suited to a high-humidity room. Good drywall work is not just about hanging sheets. It is about creating a finished surface that stands up to real-life use.
In British Columbia homes, this often matters even more in bathrooms with limited natural ventilation. A lot of older homes and some renovation layouts simply do not move humid air out fast enough. In those situations, using the right board on the right surfaces is part of protecting the room from future repair work.
Where it should not be used
Moisture-resistant drywall should not be treated as a substitute for tile backer board or other waterproof assemblies in shower and tub surround areas. If water is hitting the surface regularly, drywall is not the material you want behind the finish.
This is one of the biggest trade-offs homeowners need to understand. Moisture-resistant drywall is more durable than standard drywall in damp conditions, but it is still a gypsum-based board. Prolonged water exposure can still break it down. If you are renovating a bathroom and building a tiled shower, those wet walls should be handled with a proper substrate and waterproofing system made for that application.
The same caution applies to bathrooms that already have a history of leaks, overflowing fixtures, or heavy condensation. In those rooms, the drywall product is only one part of the fix. If the source of the moisture is not addressed, even upgraded materials can end up damaged.
What moisture resistant drywall actually does
It helps slow moisture absorption. That is the practical benefit. The facing and core are designed to resist dampness better than regular drywall, which can reduce the chance of sagging, staining, and minor moisture-related deterioration in the right environment.
What it does not do is stop water penetration the way a waterproof membrane does. It also does not make up for poor bathroom design. If the fan is undersized, the room stays wet for hours, or the caulking and tile details are failing, the board behind the finish is going to be under stress no matter what label is on it.
A better way to think about it is this: moisture-resistant drywall is part of a bathroom system, not the whole system. It works best when combined with proper ventilation, correct surface prep, quality finishing, and realistic placement.
Ceiling choices matter more than many homeowners expect
Bathroom ceilings often get overlooked, but they are one of the first places humidity shows up. Warm steam rises, collects overhead, and can linger there if the fan is weak or the room is cold. Over time, that can lead to peeling paint, joint flashing, nail pops, or a sagging look along seams.
A moisture resistant drywall bathroom ceiling can be a very sensible choice, especially in rooms used daily by a family. The key is not just the board itself, but the full assembly. Proper fastening, careful taping, a smooth finish, and a bathroom-rated primer and paint all help the ceiling hold up better.
If the ceiling already has damage, it is worth figuring out whether the issue came from humidity, a roof or plumbing leak, or previous poor workmanship. Repairing the visible surface without solving the cause usually means doing the same job twice.
Finishing makes a bigger difference than most people think
Even the right drywall can look rough or age badly if the finishing is careless. Bathrooms are unforgiving because glancing light, mirrors, and moisture all tend to reveal flaws. Uneven seams, poor sanding, and weak corner work stand out quickly.
This is where specialist drywall work pays off. A bathroom often has tight spaces, fixture cuts, bulkheads, and transitions that need clean workmanship. If repairs or renovations are being done around existing tile, trim, or textured ceilings, blending the new work properly is just as important as installing the board itself.
For homeowners, the practical takeaway is simple: ask not only what board is being used, but how the room will be prepped, finished, and protected after installation. The answer tells you a lot about whether the result is built to last or just built to look good for now.
Common mistakes in bathroom drywall work
The first mistake is using standard drywall in a humid bathroom because it is cheaper and "probably fine." Sometimes it is fine for a while. That is not the same as being the right long-term decision.
The second is using moisture-resistant drywall everywhere, including inside wet enclosures, as though one material solves every moisture issue. It does not. Bathrooms need different materials in different zones.
The third is skipping the basics - poor fan performance, no gap for drying time after showers, weak paint selection, or rushed finishing. These details may seem minor during a renovation, but they usually decide how the bathroom looks one or two years later.
Another common issue is patching over damage without checking what caused it. Stains, bubbling paint, or soft spots are warning signs. Before replacing drywall, make sure the plumbing, ventilation, and surrounding materials are not contributing to the problem.
When repair is enough and when replacement is smarter
Not every bathroom wall needs a full tear-out. If the damage is limited, the source of moisture has been fixed, and the surrounding drywall is still solid, targeted repair may be the sensible option. This is often the case with small stains, localized soft spots, or damaged sections around fixtures.
Replacement becomes the better choice when the board has lost integrity, mould is present, repeated moisture exposure has affected a larger area, or the existing installation was wrong from the start. In older bathrooms, it is not unusual to uncover multiple layers of patching, failed finishes, or materials that were never meant for a damp space.
A careful assessment matters here. Honest advice is worth more than a quick guess, especially in a room where hidden damage can keep spreading.
Choosing the right approach for your bathroom
If you are planning a renovation, think in terms of zones, not just products. Use moisture-resistant drywall where humidity is the issue. Use proper waterproof systems where direct water is the issue. Make sure the fan is doing its job. And do not treat finishing as the easy part, because in a bathroom it rarely is.
For homeowners who want the job done cleanly and correctly, that usually means bringing in a drywall specialist who understands both installation and finish quality. Companies like Devlin Drywall see the difference every day between a bathroom that was assembled quickly and one that was built with care.
A bathroom should not leave you wondering if the walls behind the paint are already failing. The right materials, used in the right places, give you a room that feels finished today and still looks right after years of steam, daily use, and real life.


Comments